Tesla Model S <2016 cable
This manual describes how to connect the Tesla diagnostic cable in the Model S for 2016 model year.
Necessities:
- OBDLink OBD2 dongle
- Suitable app, such as Scan My Tesla or TM-Spy
- Tesla diagnostic cable
Model S installation:
- Turn the vehicle ON.
- Remove the passenger side panel to expose Tesla's patented diagnostic connector. The panel is attached with multiple push buttons. You have to apply some force to loosen the panel, but you can rest assured that it is designed to be removed.
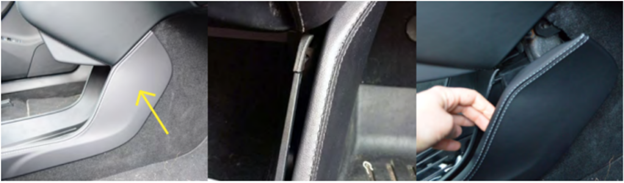
- Search the space behind the storage drawer to find the diagnostic connector if it is not immediately visible (arrow in the image below). If you have difficulty reaching the connector, try using pointed pliers or a similar tool to pull the connector toward you.
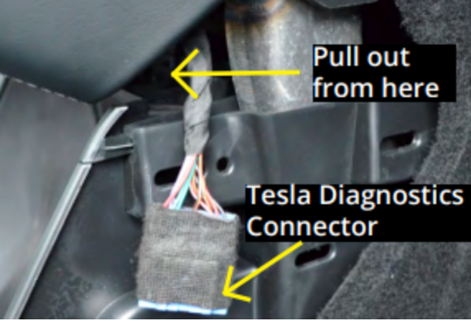
- Gently pull the cable toward you and plug the diagnostic cable into the open end of the diagnostic connector.
- Push until they click into place. The connectors only fit one way.
- Then you can plug in the OBDLink dongle and connect it to your phone or tablet.
Note: Connecting equipment to your Tesla is done entirely at your own risk. Carvitas cannot be held responsible for any damage to your vehicle caused by improper use of this product. The user is responsible for checking for any damage to the cable before use. Both upon receipt and before each use. The cable we supply is an adapter that allows you to read data from the car. The cable uses the car's CAN hi and Lo signals and also powers the OBD dongle.